Dragonscale Miniatures Home Dragonscale Miniatures Web Store Dragonscale Miniatures Gallery Dragonscale Miniatures Etsy Store About Dragonscale Miniatures Contact Form
           

Tuesday, September 11, 2012

Mermaid in a Cup

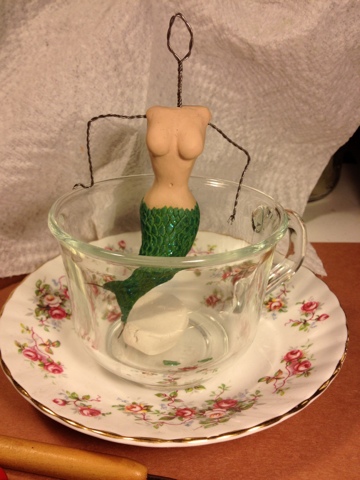
A few weeks ago a friend of mine commissioned me to make a birthday present for a friend of hers. Taking on this challenge I only know just a few things about her friend; she loves glitter, fairies, gardening, anything sparkly and pretty, making use of old items, and of course mermaids. But within a few moments I could see my finished piece for her present.

A week and a half ago I started on the project. I'm not fond of polymer clays, and I'm sure it doesn't like me either. I have such a hard time with it, but don't see any other way to create the mermaid. So I jumped on in.The first photo is the first step, the armature.


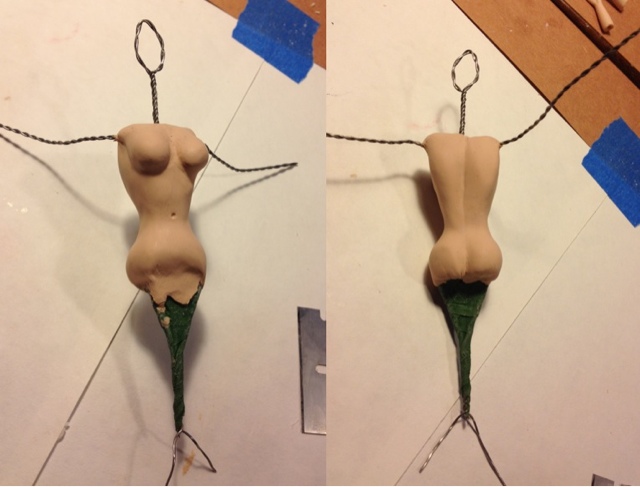
Second photo is my first attempt at the torso, it came out great for my first attempt.


Photo number three is where I've added the tail. Unfortunately here's where the torso started going down hill. The green from the tail tinted the fair skin color of the body


Next photo is just to show how she'll be sitting in the clear glass tea cup.


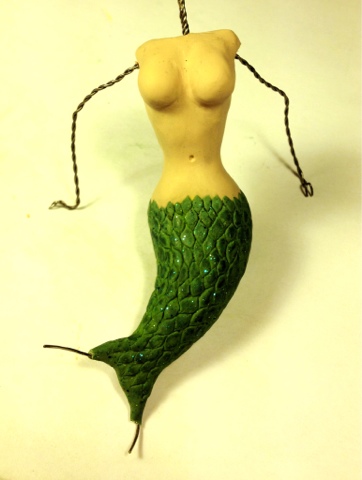
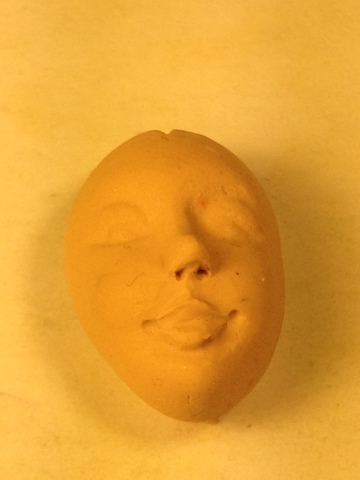
Today, over a week later from when I began sculpting I have one arm on the mermaid. Mind you I've been spending four to five hours a day (minus weekends) working with the clay. It's fought me every step of the way. I also have managed to get a face that I find acceptable, but it just needs the rest of the head before I will attach it.

More to come!Thanks for following along!


Thursday, May 10, 2012

Circle of Birch Patio

Made from natural paper birch and Creative Paperclay for the All Thing Miniatures Yahoo Group "Make" a swap between members.

Wednesday, December 7, 2011

Clay Light Up Ginger Bread House

Just finished for the holidays.
They may not be mini but they Are small houses.

Simple Gingerbread House $50.00

Both houses are made the same way from foamcore, paperclay, and texture paints. It is mounted to a beveled piece of pine, stained and painted with little button feet. It is lit with a LED nightlight bulb so that it remains cool with a rocker switch on the cord.

Please Email me to purchase.

Friday, July 22, 2011

For Sale: Fairy Junction


For Sale!
Must Go Quickly!

$450.00


Please see our Etsy Store Listing for "Faerie Junction"
by clicking the link below:
http://www.etsy.com/listing/78350330/faerie-junction-handcrafted-whimsical

Here Are The Completed Photos!


Hand Carved Balcony Railing


Tower Ceiling


Inside of tower on second floor


First floor ceiling


First floor glass mosaic tile and hand painted floor


View of first floor


Door view of second floor

Friday, February 25, 2011

The Winery - Floors & Ceiling

Well I'm turning off the lights in my work area, the time is 1:08 am. I managed to finish off the flooring, and the first floor wooden ceiling.

With most of my stock of real walnut vastly depleted most, of my time went to staining. I really do miss the days of raiding the the recycling bin at the place I used to work. It was a scenic and custom fabrication shop which included a great millwork department. Fridays I would look for scraps at the table saw bin and find all sorts of rough hewn pieces of wood just right for my mini houses. It's taken me just over two years for my stash to have just a few pieces. So sad.

The stained poplar actually came out better than I expected. Here take a look:


Here are the floors all grouted and finished:


I didn't have much time today to work. After shopping with my mom and having a good friend come and visit from out of state I started all this work at almost 6:00. So that's about 7 hours of work strait. Wow, I just realized how long it took.

Signing off for the night. Tomorrow will be a day full of clay (or at least until I run out).

Good night!

Location:DSM Workshop

Wednesday, February 23, 2011

The Winery - Floors


Well I've continued progress on my latest roombox I have entitled The Winery. The structure was build last November but I never started on the rest of the work. Feel free to follow along as I complete this for the up coming miniature show on March 13th.

A few days ago I asked all of Dragonscale Miniatures's Facebook friend what they thought I should do for the flooring in the Winery. A unanimous vote for Terra Cotta tiles won. Here they are after painting. There almost done, it's still wet which is why they are so dark, as they dry the clay-like beauty will show. After waiting for it to dry the next step is to clear coat it, and after that the grout goes on. The matte clear coat allows the excess grout to be wiped off of the tiles .

All this has to be done before I start on the walls so that the over spray doesn't cause trouble.

Tuesday, February 22, 2011

Watergardens Planted

I think I'm calling it a night but I figured I'd share these pics of almost finished items.


Bamboo ready to be planted

Starting on Items to Sell

Yesterday I got the terra cotta floors (that was chosen by my friends on Facebook) clayed. Today I'll paint and put a finish on the floors.


In the process of laying clay.


Tile lines all scribed in.

Other things on my agenda today? Well I'm hoping on getting a few of the water gardens I plan to sell landscaped so that tomorrow I can pour the water.


Cat O Nine Tails and Bamboo waiting to be planted.

Location:DSM HQ ;-)

Saturday, February 19, 2011

Welcome & First Post

Hello Everyone!
I keep getting asked, "do you have a blog?" or "Do you blog about your miniatures?" And usually I answer with "No, who has the time for that?" Then I took a small marketing course and found out that Blogs are the top thing that Search Engines look for. So really I can't afford not to Blog, so here I am. I love writing, I love miniatures, and now I'm balling up together.

Hope you enjoy this journey!

Location:DSM Headquarters ;)